Pre-recorded audio
Transcribe an audio file with a single API call
Pre-recorded audio
In this quickstart, you send an audio file to the SubQ Speech-to-Text API and receive a JSON transcript with word-level timestamps. By the end, you have a working API call you can adapt for your audio files.
Prerequisites
You need a SubQ account. If you don't already have one, create one for free.
Step 1: Get your API key
- Sign in to the SubQ API platform: Go to speech.subq.ai and sign in to your account.
- Navigate to API Keys: While signed in, select API Key on the left sidebar. Your organization's API key is displayed and ready to copy.
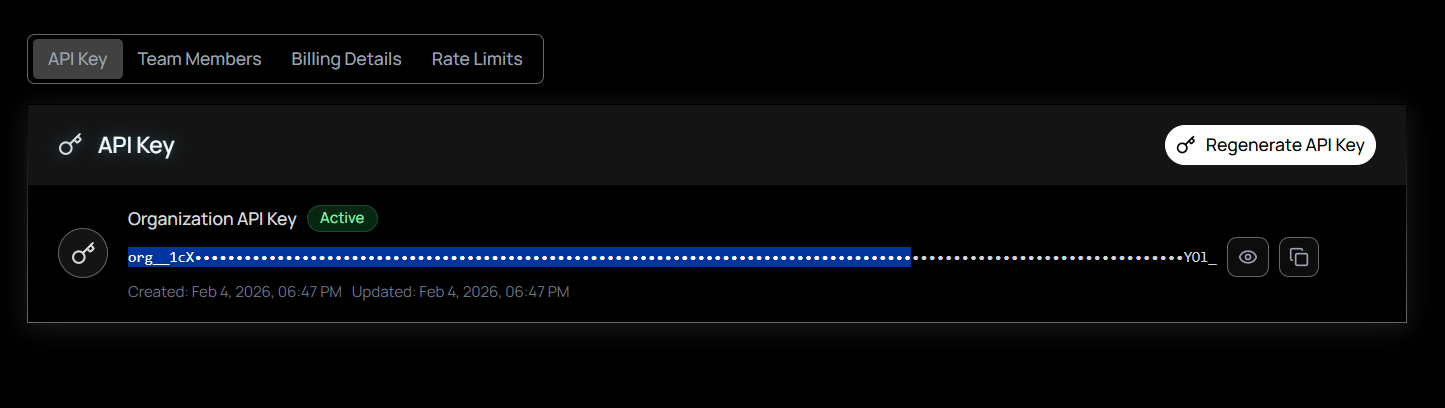
- Copy your key: Select Copy next to your key. If you need a new key, select Regenerate to replace the current one.
Never expose your API key. Store it in an environment variable or secrets manager. Do not hard-code it in client-side code, commit it to version control, or share it in public channels. If you suspect a key has been compromised, regenerate it immediately from your account settings.
Step 2: Make your first API request
Use one of the following examples to test your API key and transcribe text from speech. Replace YOUR_SUBQ_API_KEY with your actual API key.
Send a local audio file directly to the API:
curl -X POST "https://stt-api.subq.ai/v1/listen" \
  -H "Authorization: Bearer YOUR_SUBQ_API_KEY" \
  -H "timestamps: true" \
  --data-binary @audio.wav
You can also transcribe audio from a URL without downloading it first:
curl -X POST "https://stt-api.subq.ai/v1/listen" \
  -H "Authorization: Bearer YOUR_SUBQ_API_KEY" \
  -H "Content-Type: application/json" \
  -H "timestamps: true" \
  -d '{"url": "https://speech.subq.ai/subq_sample.wav"}'
Replace YOUR_SUBQ_API_KEY with your API key.
Install the requests library if you don't have it:
pip install requestsSend an audio file to the API:
import requests

API_KEY = "YOUR_SUBQ_API_KEY"

with open("audio.wav", "rb") as f:
    response = requests.post(
        "https://stt-api.subq.ai/v1/listen",
        headers={
            "Authorization": f"Bearer {API_KEY}",
            "timestamps": "true",
        },
        data=f.read(),
    )

result = response.json()
print(result["results"]["channels"][0]["alternatives"][0]["transcript"])
Run it:
python transcribe.pyReplace YOUR_SUBQ_API_KEY with your API key.
No dependencies needed. Uses the built-in fetch API (Node.js 18+):
import { readFileSync } from "fs";

const API_KEY = "YOUR_SUBQ_API_KEY";

const response = await fetch("https://stt-api.subq.ai/v1/listen", {
  method: "POST",
  headers: {
    Authorization: `Bearer ${API_KEY}`,
    timestamps: "true",
  },
  body: readFileSync("audio.wav"),
});

const result = await response.json();
console.log(result.results.channels[0].alternatives[0].transcript);
Run it:
node transcribe.mjsReplace YOUR_SUBQ_API_KEY with your API key.
The API accepts a POST request to /v1/listen with the raw audio bytes in the body. It auto-detects the audio format (WAV, MP3, AAC, FLAC, OGG, WebM, Opus, M4A) from binary headers, so no Content-Type header is needed. Add the timestamps: true header to include per-word timings in the response.
Step 3: Read the response
The API returns a JSON object with the transcript, confidence score, and word-level timestamps (when the timestamps: true header is included):
{
  "metadata": {
    "request_id": "77aaccd1-3b19-4000-9055-3f91009751b4",
    "created": "2026-03-04T12:00:00.000000Z",
    "duration": 6.916625,
    "channels": 1
  },
  "results": {
    "channels": [
      {
        "alternatives": [
          {
            "transcript": "Something, you know, it's just like I'm saying...",
            "confidence": 0.802,
            "words": [
              { "word": "Something,", "start": 0.04, "end": 0.36 },
              { "word": "you", "start": 0.44, "end": 0.52 }
            ]
          }
        ]
      }
    ]
  }
}| Field | Description |
|---|---|
results.channels[0].alternatives[0].transcript | The full transcript text |
confidence | Confidence score (0–1) for the transcript |
words | Array of word objects with word, start, and end (in seconds). Requires the timestamps: true header. |
metadata.duration | Audio duration in seconds |
metadata.request_id | Unique identifier for the request |
Next steps
You can enable speaker diarization, set the transcription language, process audio asynchronously with callbacks, and more by adding query parameters to the request URL.